Capture
Table of Contents
Learning Outcomes
- Understand the use cases and their benefits
- Understand the Capture workflow
- Understand how Capture can be deployed and integrated
Use Cases
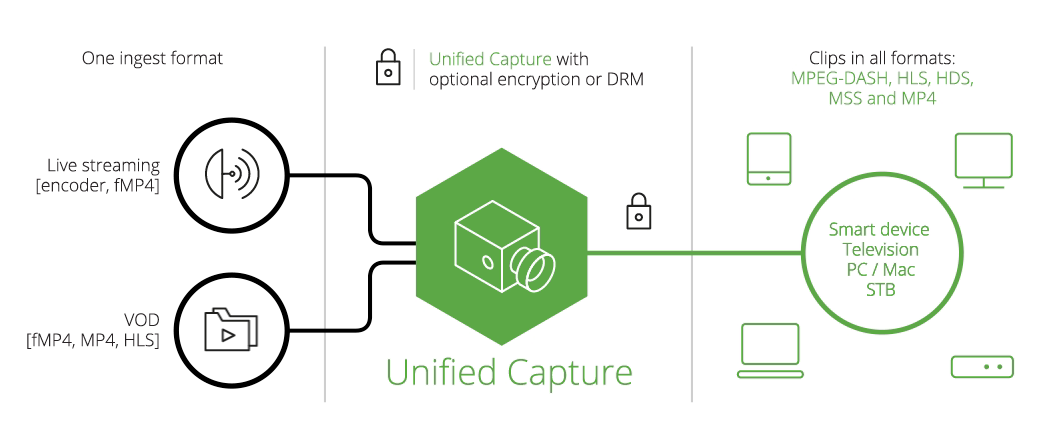
Unified Capture is a straightforward but powerful tool that allows you to capture video from a stream by pointing it to a Unified Origin client manifest. It can be used on all playout formats supported by Unified Origin.
Unified Capture is designed to be used in tandem with Unified Origin:
- Only Unified Origin should be used as a source for Unified Capture
- Only Unified Origin should be used for playing out captured content
- When capturing content, the same version of Capture and Origin must be used
With Linux Unified Capture is installed automatically alongside mp4split.
For Windows separate installation is required.
Typical use cases for Unified Capture include:
- Instant Live to VOD (catch-up TV)
- Networked Personal Video Recorder (nPVR), on premise or in the cloud
- Decrypt
- As a verification tool
Live to VOD
Capture is great for creating clips from a live linear channel: clips are created from the same stream available to viewers and all bitrates are captured, so no separate processing or encoders are required.
Possibilities include:
- record from archive: begin time and end time are in the past, but within the archive timescale
- record of archive: begin time is now or in the past, end time is in the future, capture will stop when the future time is reached and make the clip immediately accessible for catch-up.
- frame accurate recordings based on the broadcast EPG (this works for both video and audio)
- ‘stitching’ sections of the archive together into one, frame accurate, clip e.g. to skip advertisements
- selecting certain streams, by bitrates or other criteria, from the live channel
Note
For the frame-accurate option, the Intel Media SDK needs to be installed. This is not part of the test environment. [1]
nPVR
Capture may be used in a nPVR setup to create recordings programmed by viewers. As an example, the CMS could provide a login to a personalised section allowing viewers to select the programs they wish to record. The ‘record’ button creates a capture job request and the captured clip is placed in the viewer’s personal storage, the CMS provides the playout urls.
Decrypt
Capture can be used to retrieve your content library and pass on the original encryption key these renditions will be decrypted when written to disk.
Verification
Typically verification of the playout of DRMed content is difficult as the stream is encrypted and only a player understanding the DRM displays it viewable - which means human eyes are needed to make sure playout works.
Capture can be passed the encryption key to capture a decrypted clip which then could be passed into a quality control or verification tool to establish the quality and playability. This can be done in an automated setup, triggering a warning/alert if the clear version somehow is not up to standard.
Deployment and Workflows
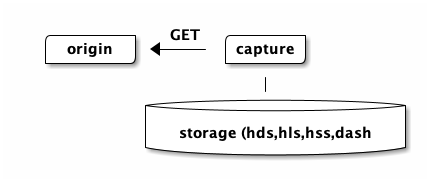
Similar to the packager, capture is a commandline tool which can be wrapped in a workflow using a job queue - see the packager section for an example (similar for monitoring).
You can use Capture via HTTP or by using a local request without any difference in the features that are supported:
Hands-On
The aim of this short hands-on is to give some insight into the set up of a rudimentary Live to VOD workflow.
Capture a clip
To start off, we will capture a short clip from a new ‘channel3’ livestream.
- Open a new shell window, login to the AWS instance and create a channel3 livestream similar to the channel1 stream in the Live hands-on section.
- Check the archive of your publishing point using the API [2]
- Choose a time range of 10 seconds that falls within the archive
- Use Capture to create a clip based on the selected time range, like so:
#!/bin/bash

URL="http://${aws_hostname}/live/channel3/channel3.isml"

BEGIN=$(date --date='10 seconds ago' --utc +%FT%T.%3N) \
END=$(date --utc +%FT%T.%3N)

unified_capture -o 10s_clip.ismv "${URL}/Manifest?t=${BEGIN}-${END}"
Note
/archive adds a ‘Z’ to the timestamp, this needs to be removed for capture.
Live to VOD
Based on this basic command and the knowledge on how to generate a VOD server
manifest or how to query the VOD origin it becomes possible to build a
workflow vor ‘live to vod’ capturing of clips. For instance using a CMS and
event triggers that call unified_capture.
The use of a SMIL playlist can be integrated into a script that captures each program broadcasted as part of a livestream, such that each program’s clip only contains the program itself and not for instancen the breaks for commercials.
Footnotes
| [1] | http://docs.unified-streaming.com/documentation/capture/media-sdk.html |
| [2] | http://docs.unified-streaming.com/documentation/live/publishing-points.html#archive |
| [3] | http://docs.unified-streaming.com/documentation/capture/live-to-vod.html#multiple-sections-into-a-single-clip |